Posted on

New York Cheesecake Recipe – GialloZafferano’s Recipe

New York Cheesecake

When it comes to cheesecake you are spoiled for choice: cheesecake cooked or cold, mini or maxi, with mascarpone or ricotta or without cream for a more version light… but the undisputed queen is only her, the New York cheesecake! The classic biscuit and butter base welcomes a soft and enveloping cream made with cheese and sour cream. Unlike no-bake cheesecakes, the gelatin isn’t necessary because the cornstarch will thicken it as it goes through the oven. Featuring a tall, thick rim, this Sweet iconic can be garnished with the topping of your choice: from the typical wild berry sauce to chocolate or caramel sauce, from fresh fruit jam with whipped cream. Whatever your choice, with cheesecake you are always on the safe side!

Also try these delicious variations of the cheesecake:


Read the recipe in English

To make the cheesecake, start from the base: melt the butter in a saucepan and leave to cool. Pour the biscuits into a mixer 1 and blend to finely chop them, while adding the melted butter 2 and a pinch of salt. You will have to obtain a mixture with a consistency similar to wet sand 3.

Grease and line a 24 cm diameter springform pan with parchment paper, covering both the base and the edges. Transfer the biscuit mixture into the mould 4 and press well to compact it, helping yourself with the bottom of a glass 5. Bake the biscuit base in a preheated static oven at 180° for about 10 minutes, then remove from the oven and leave to cool completely 6.

Lower the oven temperature to 150° and move on to the preparation of the cream. Pour the cheese into a large bowl and soften it with a marisa 7then add the sugar 8 and stir to combine. Also add the sour cream 9 and mix again.

Beat the eggs in a separate bowl and pour them into the bowl a little at a time 10, stirring to incorporate them evenly. Flavor the mixture with the vanilla extract 11 and the grated lemon zest 12.

Also add the lemon juice 13 and mix well. Finally sift the cornstarch into the bowl 14 and mix everything. Tap the bowl on the work surface a couple of times to eliminate air bubbles, then pour the cream cheese onto the now warmed biscuit base 15.

Level the surface a little 16slam the mold once again on the work surface and cook in the static oven at 150° for about 70-80 minutes, placing a saucepan filled with hot water at the base of the oven to create the right amount of humidity 17. Once baked, the cheesecake will still be slightly wobbly in the center. Turn off the oven and let it cool completely inside. When it has cooled down 18transfer the cheesecake to the refrigerator and let it harden for at least 4 hours, or better overnight.

After the firming time, dedicate yourself to the decoration: pour the blackberries, blueberries and raspberries into a saucepan 19 along with the sugar 20. Mash with a fork 21bring to the boil and cook for about 5 minutes, stirring often.

Meanwhile, dilute the cornstarch with water 22. Pour the mixture a little at a time into the saucepan, so as to reach the desired consistency 23; the sauce must be fluid and shiny 24.

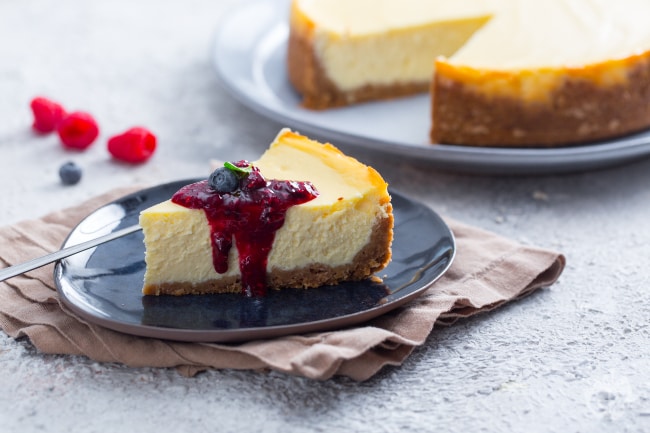
At this point you can gently unmold the cheesecake and transfer it to a serving plate 25. Serve your beautiful cheesecake garnished with berry sauce 26 and a few mint leaves 27!

If you prefer, you can garnish the cheesecake with fresh fruit, caramel, Nutella, jam or a chocolate sauce!

If you don’t find the sour cream you can make it at home with our recipe.

To prevent the cheesecake from cracking it is important to incorporate as little air as possible during the preparation of the cream, for this reason it is preferable to work the ingredients with a spatula or wooden spoon.

Posted on

Pizza dough recipe

Pizza dough

Soft from the crust or cornice (as they call it in Naples) swollen. Low and crunchy, thick and soft: pizza has many faces, today we show you the most classic, common and perfect one to make at home in a few hours. The pizza dough that we offer, in fact, rises for about 6 hours: you can then organize yourself to prepare it during the day and enjoy it in the evening with the toppings you prefer. A simple basic recipe for a homemade pizza that is prepared with just a few ingredients and then garnished as you see fit, perhaps even giving it an unusual shape, like our soft one donut pizza. Are you ready to get your hands dirty? Today we discover all the secrets for preparing pizza dough, also perfect for preparing a delicious one rustic pizza!

If you are a pizza lover try recipes:


Read the recipe in English

To prepare the pizza dough we have chosen to knead everything by hand, but if you prefer to use the mixer you can follow the same procedure, using the hook at medium-low speed. First, pour the two flours into a bowl 1crumble the yeast inside 2 and pour a little of the dose of water 3. The ideal water temperature is 25°.

Mix with a wooden spoon 4 and slowly add the water 5. Always keep stirring and when you have added about half of the water you can also add the salt 6.

Then add the remaining water, always slowly, until you obtain a homogeneous mixture; help yourself with your hands to work it better 7. Finally, transfer the dough to the work surface and knead it with your hands 8 until it is smooth and homogeneous 9.

Once you have obtained a nice smooth dough, let it rest on the work surface for about ten minutes, covering it with the bowl 10. Once rested, give it a small fold: imagine that the sphere is divided into 4 parts, take the end of each one, pull it gently and fold it towards the center 11. Then fold the dough 12.

Turn it over on itself 13give it the shape of a sphere 14. Transfer the dough thus formed into a bowl, cover with transparent film 15 and let rise. For convenience you can put the bowl in the oven off but with the light on, so the inside will reach a temperature of 26-28°, ideal for leavening; alternatively you can also keep the basin in a warm place. Times are approximate since each dough, temperature and weather conditions influence leavening: on average, the dough should take 6 hours to double in volume.

After the leavening time, the dough will be nice and swollen 16then transfer it to the work surface and divide it with a tarot into 3 pieces of 265 g 17. If you need it, you can lightly flour your work surface. Now take each portion and as before lift a flap of dough 18 and bring it inside.

Then repeat the same thing for the other 3 flaps of dough 19. Then stretch the dough by folding it on itself 20 and proceed with the kneading: kneading the dough means turning it with your hands on the work surface, bringing it towards you and then repeatedly moving it away until you get a smooth and regular ball 21.

Gradually transfer the loaves into a previously greased pizza box 22cover with the lid 23 and let them rest for another 30 minutes 24before you can roll out the pizza dough and season it to your liking!

Once leavened, the dough is cooked. If you prefer to keep it, you can reduce the amount of yeast, cover the bowl with plastic wrap and let it ripen in the refrigerator for 8-12 hours. Once the time has elapsed, it will be sufficient to let the dough acclimate and then proceed as per the recipe.

Once leavened, the pizza dough can also be frozen, better if already divided into portions, and stored in a freezer bag. Subsequently it will be sufficient to let your portion defrost at room temperature and continue as per the recipe.

If you prefer, you can also freeze the semi-cooked pizza: just half-cook it, let it cool and finally freeze it by wrapping it in plastic wrap; then it will be enough to cook it, still frozen, at a slightly lower temperature.

Our pizza dough is slang it is cut. It means that there are two types of flour: 00 and manitoba. Which means that the low protein value of one and the high protein value of the other will create a perfect value for the pizza, which is between w260 and w300.

The letter w it is an index of the percentage of proteins present in the flour. A low value corresponds to a weak flour, generally the most suitable for desserts. A high value favors leavened doughs because they are richer in gluten. What is Gluten? In summary it is a protein that is developed by mixing water and flour and has elasticising properties.

If you prefer to add oil to the dough, leave everything unchanged and add 35 g of oil during kneading.

You can cook the pizzas individually.
In this case, after having rolled out the first pizza, you can bake it at 250° for 6 minutes with just a drizzle of oil. After 6 minutes, remove from the oven, season the pizza and cook for another 6 minutes. We always recommend the use of a refractory stone.

If, on the other hand, you prefer to make a pan pizza. With these doses you can make a pizza in a large 30×40 cm pan. In this case you will not have to make the 3 loaves, but only one. We recommend cooking it at 250° for 25-30 minutes.

SPECIAL: The best bread machines

Posted on

Chocolate cake recipe with dark heart

Instead of the mixer you can use an immersion blender to mix the ingredients. Alternatively you can work eggs and sugar first and then incorporate the rest of the ingredients with a marisa. Keep in mind that with the mixer or blender you will get a smoother texture!

If you prefer to omit the freezing step, the cooking time will be a little shorter: we recommend cooking them in a preheated convection oven at 180° for 7 minutes, first testing with only one so as to better adjust for the next ones.

You can melt the chocolate in the microwave instead of in a bain-marie: in this case, operate it at intervals of up to 30 seconds, stirring each time to prevent it from burning.

If you use the oven in static mode, you will need to extend the cooking time by a few minutes.

For a gluten-free version you can replace the flour with 17 g of rice flour and 8 g of potato starch, sieved together.

Posted on

Maple syrup pancakes

Maple syrup pancakes

There is no better breakfast than the one made slowly, with i maple syrup pancakes! Soft pancakes to be served in the classic way, with syrup, or with jams, melted chocolate, fresh fruit and whipped cream. Every day you can make a perfect recipe of the perfect pancake recipe also different as a dough: light without eggs, without yeast or without butter, protein pancakes And fatpancake for sportsmen, filled with chocolate for gourmands, or a super version fluffy that comes directly from Japan! How can you resist so much goodness? If your mouth is already watering and you don’t want to wait for breakfast, know that pancakes with maple syrup are also excellent for a snack!

Discover the other delicious ones too pancake recipes of the American breakfast and brunch:

To make the pancakes, first melt the butter over a very low heat, then let it cool. Meanwhile, separate the egg whites from the yolks: pour the yolks into a bowl and beat them with a hand whisk 1then add the melted butter at room temperature 2 and the milk flush 3, always continuing to mix with the whisk. Also add a pinch of salt and whisk the mixture until it is clear.

Add the yeast to the flour 4 and sift everything into the bowl with the yolk mixture 5. Stir again to incorporate the powders 6.

Now whip the egg whites that you have kept aside, pouring the sugar a little at a time 7. When they are white and frothy, gently incorporate them into the yolk mixture, moving from bottom to top to avoid disassembling them 8. Heat a crepe maker or non-stick frying pan (preferably with a thick bottom) over medium heat and grease it with a little butter, using kitchen paper. Pour a ladleful of the mixture into the center of the saucepan 9.

After about 2 minutes, bubbles will begin to appear on the surface, so flip the pancake with a spatula 10 and brown the other side for about half a minute 11. Continue like this with the rest of the dough and gradually place the pancakes on a serving plate, stacking them on top of each other; with these doses you will get approximately 12 pancakes. Serve your maple syrup pancakes still warm 12!

Pancakes are recommended to be served immediately. You can keep the cooked pancakes in the refrigerator for up to 2 days, warming them up before eating.

The dough can be stored in the refrigerator covered with plastic wrap for a day at most.

Freezing is not recommended.

Posted on

tiramisu

tiramisu

Tiramisu is one of the cornerstones of Italian cuisine, one of the most loved and made spoon desserts in the world. The origins of tiramisu are very uncertain and several cities claim its paternity. What we are sure of is that since 1980, the year in which this term was inserted into the Italian vocabulary, tiramisu has had enormous success! To date it is among the best known Italian words abroad. But what makes tiramisu so special? We certainly love the fact that it is very simple to prepare, his mascarpone cream it is irresistible, so tasty and velvety, interspersed with layers of ladyfingers soaked in coffee! There are those who love to flavor the syrup with Marsala and those who prefer to use other liqueurs, but we love it like this, in purity and we offer you the most classic version, perfect for any occasion!

Even if we have not discovered who the inventor of tiramisu in the current version is for sure, identified by some as Ado Campeol (the owner of the well-known and historic restaurant “Il Becchiere” in Treviso), we share with you our recipe for one of the best tiramisu you’ve ever tasted! Prepare it too and let us know!

And after preparing the classic, also discover these delicious variants:


Read the recipe in English

To prepare the tiramisu, prepare the coffee with the mocha to obtain 300 g, then sugar to taste (we put a teaspoon) and let it cool in a low, large bowl. Separate the eggs by dividing the whites from the yolks 1, remembering that in order to whip the egg whites well, they must not have any trace of yolk. Whip the egg yolks with an electric whisk, adding only half the amount of sugar 2. As soon as the mixture has become clear and frothy, and with the whisk still running, you can add the mascarpone, a little at a time 3.

Once you have incorporated all the cheese, you will have obtained a thick and compact cream 4; keep it aside. Clean the whisks very well and start beating the egg whites 5. When they are foamy, pour the remaining sugar a little at a time 6.

You will have to mount them in firm snow 7; you will get this result when by overturning the bowl the mass will not move. Take a spoonful of egg whites and pour it into the bowl with the mascarpone cream 8 and mix vigorously with a spatula 8, so you will dilute the mixture. Then proceed to add the remaining egg whites, little by little, mixing very gently from bottom to top. 9.

The mascarpone cream is now ready 10. Distribute a generous spoonful of it on the bottom of a 30×19.5cm glass baking dish and distribute well over the entire base. Dip the ladyfingers for a few moments in the iced coffee, first on one side and then on the other 12.

Gradually distribute the soaked ladyfingers in the baking dish, trying to arrange them all in one direction, so as to obtain a first layer of biscuits 14. Add more mascarpone cream and level it to cover them completely 15.

And keep distributing ladyfingers soaked in coffee 16then make another layer of cream 17 and level the surface well 18.

Transfer the remaining cream into a sac-à-few with a smooth 12 mm diameter spout and make tufts for the entire size of the pan 19. Dust it with cocoa powder 20 and let it harden in the refrigerator for a couple of hours 21. Your tiramisu is ready to be enjoyed!

You can add dark chocolate flakes or chocolate chips as you like.

Sweeten the coffee according to your taste!

Realize the mascarpone cheese at home with our recipe!